jal
| ← Installing | Contents | Next: The main window → |
3. Your first half hour
This chapter takes you from an empty JAL to a window that shows your real balances. Do the four steps in order; each takes a few minutes.
Step 1 — Tell JAL where you live
JAL needs to know one thing before anything else: which currency your totals should be shown in. It takes that from your residence — the country you live in, the currency you report in, and the clock your dates are read on.
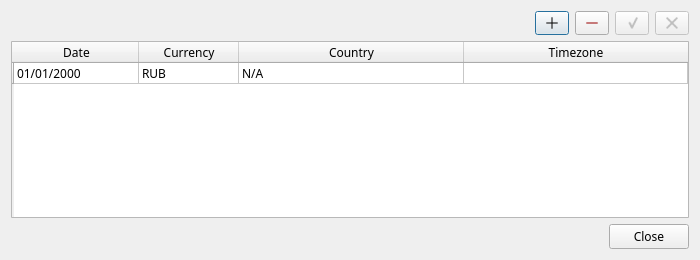
Open Data → Residence. A new database already has one row in it, dated 1 January 2000, with the currency set to RUB:
Change that row to describe you:
- Double-click the Currency cell and pick your own currency from the list.
- Double-click Country and pick your country.
- Double-click Timezone and pick the zone you live in (for example
Europe/Berlin). - Click the ✓ button at the top right to save, then Close.
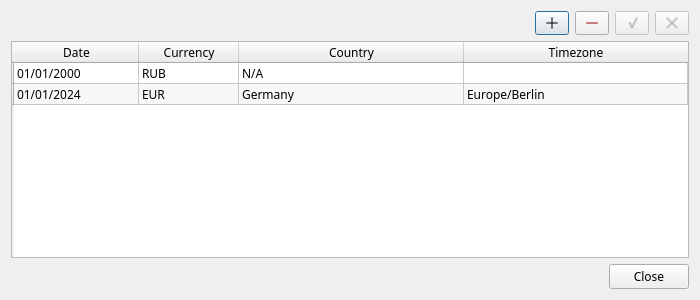
Only three currencies are offered at first — EUR, USD and RUB, the ones JAL is shipped with. If yours is not there, see Adding a currency in chapter 6.
Moved country? Do not overwrite the old row — add a second one (the + button) dated from the day you moved. JAL keeps a timeline, so each operation is reported under the rules that applied when it happened. Most people only ever need one row.
Step 2 — Create your accounts
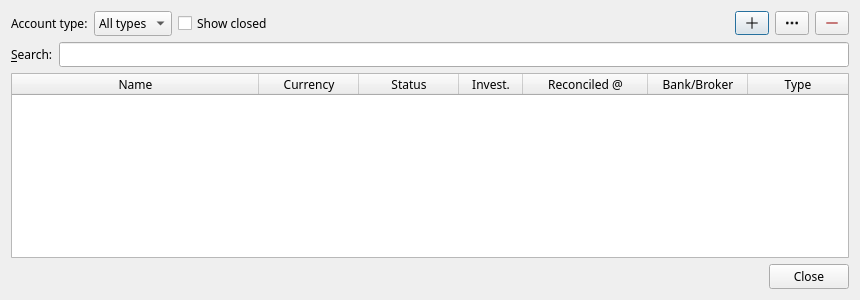
Open Data → Accounts. The list is empty:
Click +. A form opens:
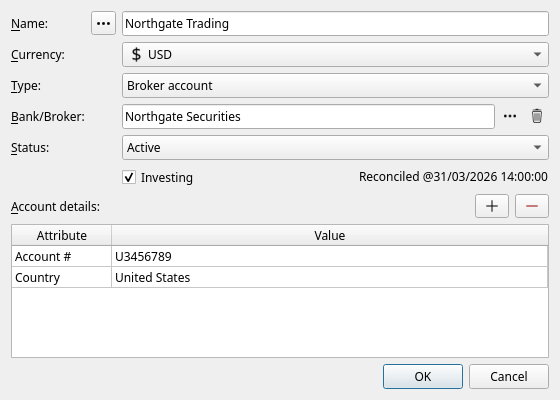
Fill it in:
| Field | What to put there |
|---|---|
| Name | Whatever you will recognise: Everyday Card, Main Bank, Cash in wallet. |
| Currency | The one currency this account holds. |
| Type | Cash, Bank account, Card, Broker account, Wallet (crypto) or Crypto exchange. Used for grouping and for offering you the right things later. |
| Bank/Broker | The institution. Leave it as None for cash. Type into the box to search, or press … to pick from the list — where a new institution can be added. |
| Status | Active for an account you use day to day. Background keeps the account fully in the books but folds it away into one summary row. Closed is for an account that no longer exists — see Accounts you no longer use. |
| Investing | Tick it only for accounts that can hold shares, funds, bonds or crypto. |
| Account details | Extra facts, added with the + button next to the table: Account #, Credit (a card’s credit limit), Country, Precision (how many decimals the account counts in — 2 for money), Tag (see Tags), Opened on and Closed on (the dates, for your own record), Card (last 4 digits) (lets a shop receipt paid by that card find its account). |
Click OK. Repeat for every account you have, then Close.
One currency per account. A bank account you hold in two currencies is two accounts in JAL. Give the second one the same account number and JAL will offer to copy the first one’s settings.
How much is in them right now?
JAL computes balances from operations, so a brand-new account starts at zero. Tell it where you are starting from by recording one operation per account:
- In the main window pick the account (the Account: box above the operations list).
- Press the + button at the right and choose Income / Spending.
- Set the date to the day you are starting from.
- In the table at the bottom press + to add a line, set its Category to Starting balance and its Amount to what the account holds (a negative amount for a card you owe money on).
- Press ✓ to save.
Step 3 — Set up your categories
Categories are what makes the spending reports useful. JAL comes with a small set — Income, Spending, Profits and a few required ones — and you add your own underneath them.
Open Data → Categories:
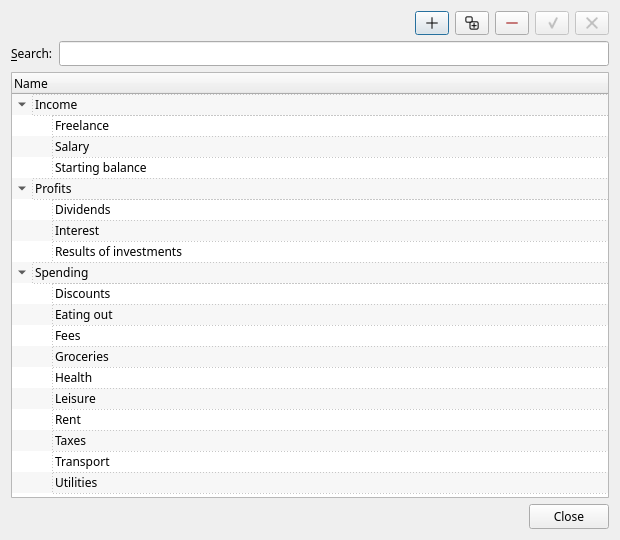
- + adds a category next to the one selected; the button beside it adds one inside it.
- Type the name, press the ✓ button to save.
Ten or fifteen categories are plenty: Groceries, Rent, Utilities, Transport, Eating out, Health, Leisure, Salary. You can add more at any time.
Ten categories are built in — Income, Spending, Profits, Starting balance, Fees, Taxes, Dividends, Interest, Results of investments and Discounts. JAL writes into them itself when it books a fee or a dividend, or a discount off a whole shop receipt, so they cannot be deleted. You may rename them, and you may put your own categories underneath them.
Step 4 — Record something
Pick an account, press +, choose Income / Spending and fill in the editor at the bottom of the window:
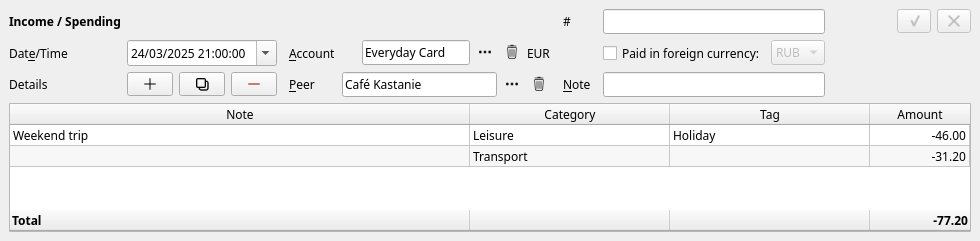
- Date/Time — when it happened.
- Peer — the shop, employer or person on the other side. Type a new name and JAL offers to create it.
- The table — one line per thing you are recording. Each line has a Category, an optional Tag, an optional Note and an Amount. Money going out is negative; money coming in is positive. A supermarket bill split into Groceries and Household is two lines on one operation.
- ✓ saves, ✗ throws the changes away.
The operation appears in the list above and every balance updates immediately.
What next
You now have a working ledger. From here:
- Chapter 4 explains every part of the window you are looking at.
- Chapter 5 covers day-to-day recording: transfers, tags, reconciling.
- If you have a brokerage account, go on to chapter 6.
- Before you have much to lose, read the two paragraphs on backups in chapter 12.
| ← Installing | Contents | Next: The main window → |